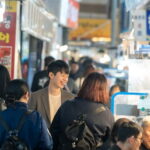
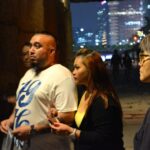
Seoul street photos get a history brain. I love how you get real context around Jongmyo while a pro photographer handles where to stand, how to pose, and what to shoot. I also love that you finish with fully edited images, not just a few snaps. One thing to keep in mind: this is a moderate walking tour and it is not suitable for people with mobility impairments.
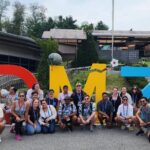
This is built as a small-group outing (up to 10), so you’re not fighting the crowd for a good angle. You also get a satisfying finish in Ikseon-dong, so after the shoot you can keep wandering and grab a coffee in the hanok area.
If you like street scenes, history you can actually see, and photos where you look like you belong there, this tour makes Seoul feel easy.
In This Review
- Key things I’d zero in on
- Seoul Street Photoshoot Tour: why this works better than a DIY walk
- Meeting at Jongno 3-ga Exit 5 and how the 2-hour pace really feels
- Ikseon-dong Hanok cafe street: where the first photos start feeling natural
- Jongmyo Shrine: the UNESCO stop that gives your photos a story
- Sewoon Arcade: texture, repetition, and why you visit more than once
- Cheonggyecheon at golden hour: light that flatters without overthinking
- The final photo stop and getting back to Jongno 3-ga
- Your pro photographer and edited photo delivery (OneDrive link)
- History storytelling in Jongno: what you learn while you walk
- What to bring: shoes, sun protection, and a camera that’s ready
- Price and value: $44 for photos plus history and guidance
- Who should book this Seoul tour, and who should skip it
- Should you book this Street Photoshoot and Hidden Gem History Walking Tour
- FAQ
- How long is the Seoul street photoshoot and history walking tour?
- Where do we meet for the tour?
- When and where does the tour end?
- What’s included in the price?
- Do I need to bring a camera?
- Are meals included?
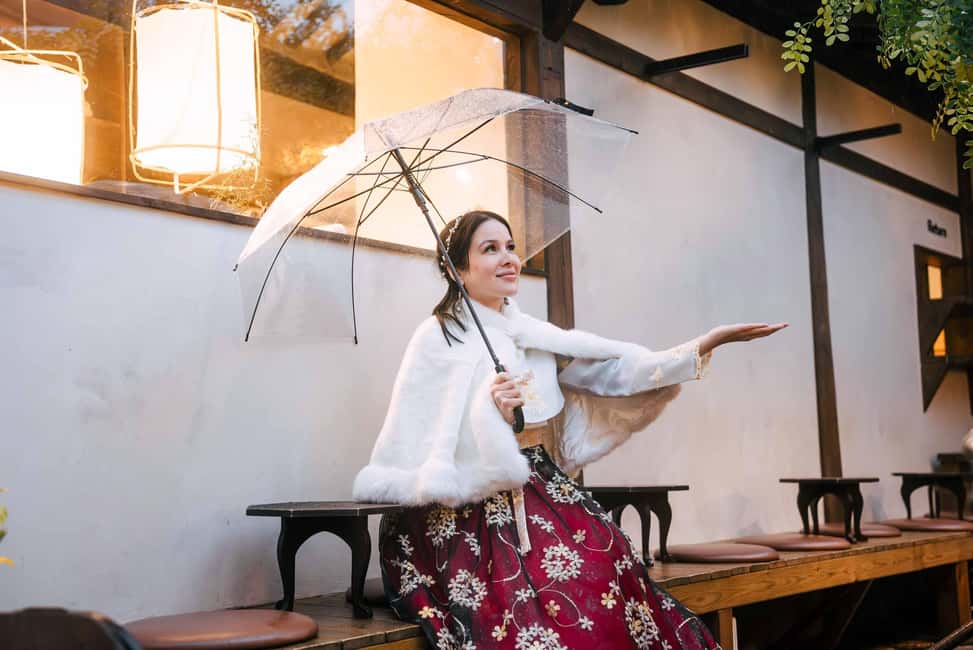
- Is an umbrella provided if it rains?
- What group size is it?
- What languages are the guides speaking?
- What are the cancellation terms?
- Is the tour wheelchair accessible?
Key things I’d zero in on
- Jongno 3-ga Exit 5 meeting point sets you up right in the center of action
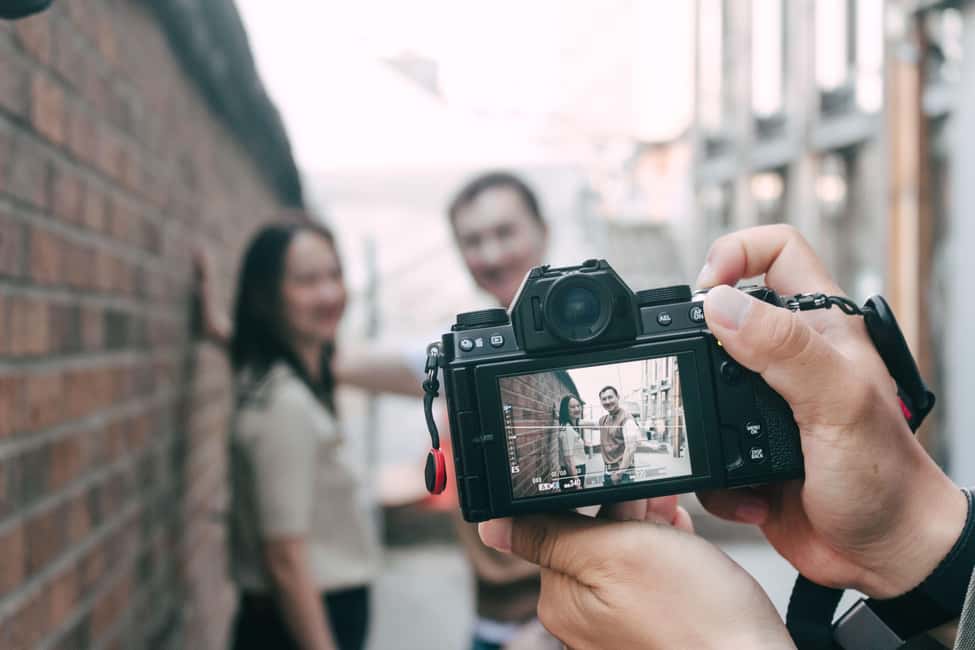
- Pro photographer guidance for composition, timing, and natural posing
- Jongmyo Shrine + UNESCO context explained in plain, walk-along stories
- Sewoon Arcade photo stops twice to catch different textures and angles
- Cheonggyecheon golden-hour light for reflections and relaxed portraits
- OneDrive link for edited photos for a month so you can share after you get home
Seoul Street Photoshoot Tour: why this works better than a DIY walk
A self-guided day in Seoul can be great. But when you’re trying to get good photos of yourself, things get awkward fast: you’re holding the phone, chasing the light, and guessing where the camera will like the scene.
This tour solves that. You’re walking through key areas of Jongno, with a historian-style guide telling you what you’re seeing and why it matters, while a professional photographer helps you turn street corners into portraits. The result is both practical and fun: you get your bearings, and you leave with photos you didn’t have to engineer.
What also makes it feel worth your time is the edit-and-deliver approach. You’re not only paying for the walk. You’re paying for post-processing and color edits, plus a downloadable Microsoft OneDrive link that stays available for a month.
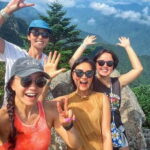
For people traveling solo, this part is a big deal. You’re not stuck asking strangers to take one photo and then hoping it turns out.
You can also read our reviews of more walking tours in Seoul
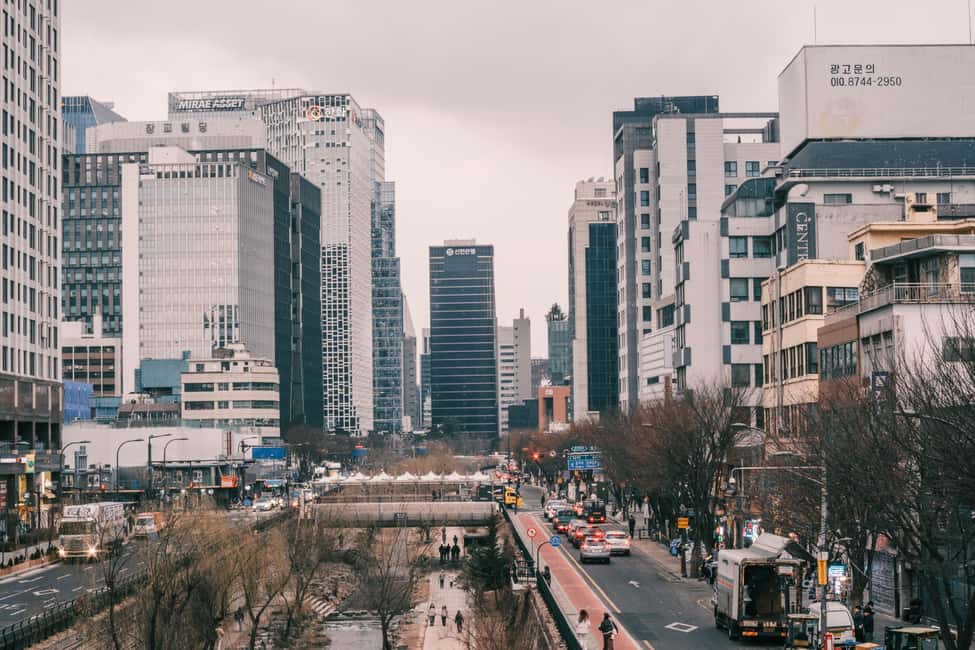
Meeting at Jongno 3-ga Exit 5 and how the 2-hour pace really feels
You meet at Jongno 3-ga Station, Exit 5. That’s handy because it’s central and easy to reach once you’re in Jongno.
The timing is compact: you’re out for about two hours with a guided stroll and multiple photo stops. The pace is “comfortable but active.” Plan on walking and stopping often, not covering Seoul in miles. The breaks are part of the structure—each location gets a moment for learning, a moment for photos, and a moment to reset.
Small group size matters here. With a cap of 10 participants, your guide and photographer can actually help you. In practice, that means you’re more likely to get corrected quickly on angles and posture, instead of waiting your turn.
Tour ends in Ikseon-dong. That’s a smart move because you’re not stranded at a random spot after the last shutter click. You can keep exploring, grab a café, or just wander the lanes while you’re still in the zone.
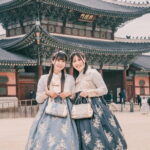
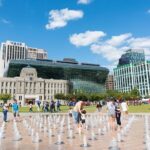
Ikseon-dong Hanok cafe street: where the first photos start feeling natural
Ikseon-dong is the kind of neighborhood where the streets look composed on purpose. The tour starts you there for the first real photo stop inside the hanok cafe area.
This is a good early segment because it sets expectations. You’ll get coached on what makes a good street photo: using lines and doorways, finding light that flatters faces, and choosing a background that doesn’t turn your shot into visual chaos.
The walking here is also the right level of easy. You’re not sprinting between landmarks. You’re learning how to move slowly and get different looks from the same general spot. That’s a useful skill in Seoul, because a lot of great photos come from small changes: turn a few steps, raise your chin slightly, let the alley framing do the work.
If you want a personal tip from how guides in this kind of format tend to work: bring a camera and wear something you can move in. You’re going to be guided into positions, and comfortable clothes make the posing feel normal instead of forced.
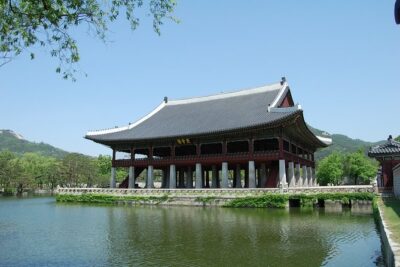
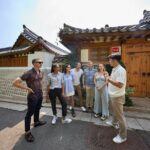
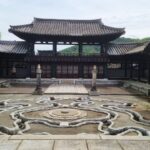
Jongmyo Shrine: the UNESCO stop that gives your photos a story
Jongmyo Shrine is a standout in the route, and it’s also where the tour’s history layer really earns its keep.
You get a guided visit and photo time here, with stories meant for walking ears, not classroom ears. The value is that you learn what you’re looking at while you’re standing in front of it, so your photos don’t feel like generic landmark shots. You understand the setting, the significance, and the why behind the visuals.
This is also one of the best places for a photographer to work. Big structures and careful architecture give you strong backgrounds. That means you can focus on your face and posture while the shrine environment handles the rest of the composition.
There’s one small practical consideration: historic sites can mean crowds and strict sightlines. The best way to stay relaxed is to let the guide set you up for the correct angles and timing, then follow the flow. When you don’t have to improvise, you get better photos.
Sewoon Arcade: texture, repetition, and why you visit more than once
Sewoon Arcade shows up more than once in the tour. That’s not an accident. Arcades like this are visual pattern machines: repeating corridors, textured walls, shop signs, and long perspective lines.
Visiting twice gives you a chance to shoot from different light and walking positions. Even if you stay in the same general area, you can end up with totally different results just by shifting how you frame the shot and where you stand.
This stop is also where the photography coaching tends to pay off for real. A photographer will often show you how to line up your subject with architectural rhythm, so you don’t end up with a flat background. If you’ve ever taken a street photo and thought it looks like a generic “standing in front of a building” picture, this is exactly the kind of environment that helps fix that.
One more reason this arcade segment is smart: it’s a break from open-air walking. It’s still busy, but it’s easier to control your shots when you’re not constantly chasing sun direction.
You can also read our reviews of more historical tours in Seoul

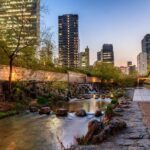
Cheonggyecheon at golden hour: light that flatters without overthinking
Cheonggyecheon is where the tour leans into the golden-hour promise. You get a photo stop there with a guided walk.
The appeal is simple: moving water creates reflective light and soft visuals. You don’t need to work hard to make the background look good. Your job becomes choosing moments—pose, look, then let the light do the smoothing.
This segment also tends to make people relax. Compared to heavier landmark areas, the waterfront gives you a more natural pace. You’ll likely get easier, less stiff photos because you’re not standing in a single spot the whole time. You’re moving with the group, and the photographer can guide micro-adjustments.
If the weather is bright, sunscreen matters. If it’s humid, water matters. These sound obvious, but they affect how long you last and how your photos turn out. A tired face and squinting eyes don’t look great, even if your framing is perfect.
The final photo stop and getting back to Jongno 3-ga
After the main anchor sights, you have another guided photo stop before returning toward the starting area.
This portion is useful because it helps you avoid that common travel problem: you get a few photos early, then your energy drops, and the last part of the day becomes random. Here, the pacing stays organized. You keep getting coached, you keep learning, and you keep turning the streets into intentional images.
When you wrap up, you return to Jongno 3-ga Station. From there, the tour finishes at Ikseon-dong, which is convenient if you want to continue at your own pace while you’re still in the mindset of seeing photo opportunities.
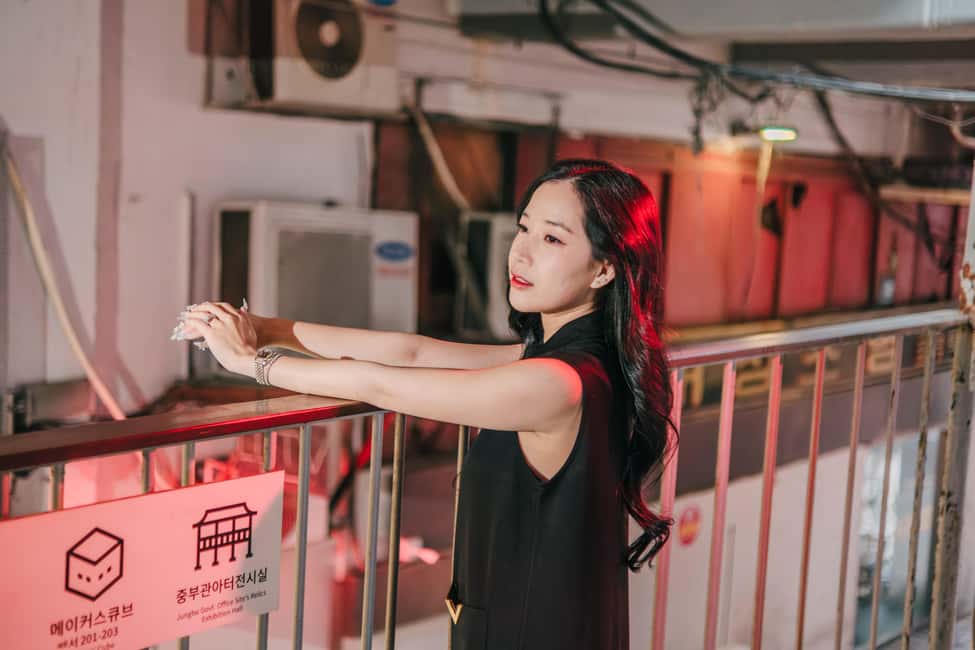
Your pro photographer and edited photo delivery (OneDrive link)
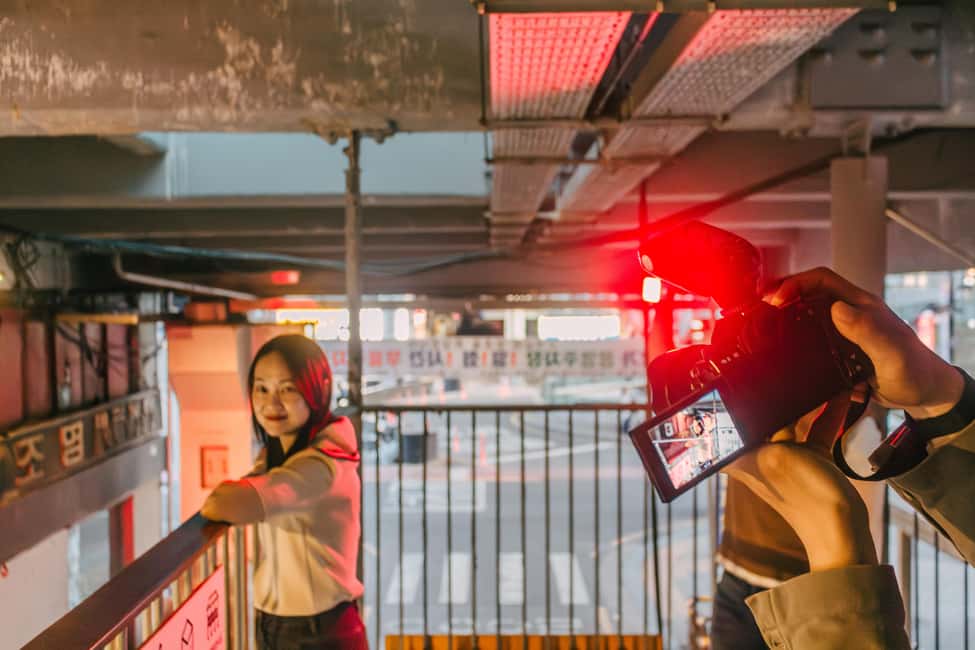
This tour isn’t just “take pictures together.” You’re getting structured photo help and then a polished output.
You receive all edited photos with post-processing and color edits. You also get a downloadable Microsoft OneDrive link that stays available for one month. That means you can share with friends soon after, and you’re not scrambling to find files while you’re already moving to the next place.
What I like about this approach is the practical payoff. You don’t need to know photo-editing software. You also don’t need to pick which shots are best during the chaos of the day. The photographer’s job is to capture good material, and the editing step turns that into something more consistent.
Based on what I’ve seen people praise in this style of tour, the coaching can make a big difference for solo participants. If you don’t usually feel comfortable being photographed, you’ll appreciate the patience and the guidance on posing and timing.
Packing tip: bring your camera, but also charge everything the night before. Two hours is short. You want the focus to be on shooting, not power anxiety.
History storytelling in Jongno: what you learn while you walk
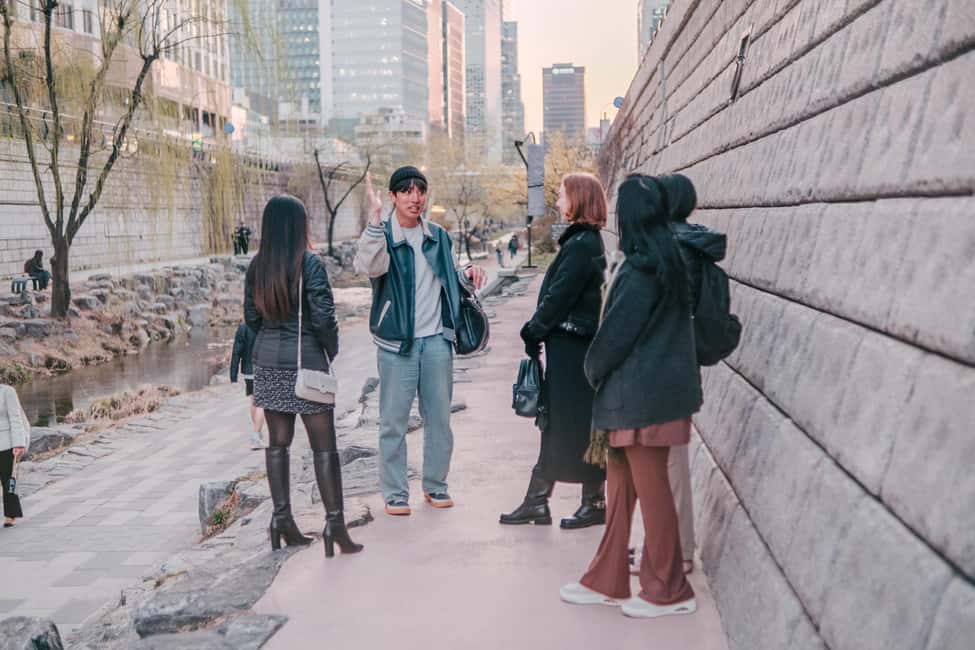
The tour combines neighborhood storytelling with specific landmark context. In plain terms, you walk through Seoul’s core districts while someone explains what the streets mean, not just what they look like.
In this kind of format, the strongest guides do two things. First, they connect the landmark details to everyday city life. Second, they keep the pacing fun, so you’re not counting minutes for a lecture to end.
Guides on this tour include James and Jacob, and people often call out that they’re friendly and very thorough. That matters because when you’re shooting, you can’t afford to zone out. Good storytelling keeps you engaged, and it also makes your photos more intentional—your background and your pose start to match the meaning of the place.
You’ll also get UNESCO-linked context through the route’s heritage focus. Jongmyo Shrine is the clearest heritage anchor on the itinerary, and learning it in the moment makes it feel less like a checklist item and more like part of how Seoul works.
What to bring: shoes, sun protection, and a camera that’s ready
For a two-hour walking tour, your body comfort controls your mood, and your mood controls your photos.
Bring:
- Comfortable shoes for repeated stop-and-go walking
- Hat and sunscreen for sun exposure
- Water, so you don’t get cranky halfway through
- Camera (or phone) so you can follow the photographer’s prompts
Dress for the weather. If it’s hot, lightweight and breathable helps. If it’s cooler, layers help you stay comfortable between shaded and sunny spots. And yes, an umbrella can be a lifesaver, but it’s not included—so if rain is possible, plan accordingly.
Also, consider bringing an extra small change of clothing or accessories if you want variety in the pictures. People who do well on photo tours tend to think about how one outfit can look different in different light.
Price and value: $44 for photos plus history and guidance
At $44 per person, this tour sits in the budget-friendly to mid-range zone—especially because it includes more than a guide.
You’re paying for:
- Historical storytelling
- Access to photo stops across key areas of Jongno
- A professional photographer’s coaching
- All edited photos with post-processing and color edits
- A downloadable OneDrive link for one month
If you’ve ever compared solo-photo services in big cities, the “edited photos delivered online” part is often the difference between a decent day and a really valuable one. You’re not just leaving with memories. You’re leaving with assets you can use right away: social posts, saved portraits, and a stronger travel photo portfolio.
Small group size also supports the value. With a limit of 10, you get more attention, faster adjustments, and fewer moments where you wait while someone else gets guided.
Who should book this Seoul tour, and who should skip it
This is a strong fit if you:
- Want a mix of Seoul street photography and history in one outing
- Are traveling solo, and want photos where you’re actually in them
- Enjoy golden-hour shooting and street-level scenes
- Like having a clear route so you don’t waste time deciding what to do next
It’s also a good fit for couples and friends who want photos that look intentional, not accidental.
Skip it if:
- You need wheelchair access or have mobility constraints that make walking difficult. The tour is not suitable for wheelchair users.
If you’re mainly looking for a slow sightseeing stroll with lots of sitting, this may feel too active. But if you like walking, shooting, and learning as you go, it’s a fun way to understand Seoul quickly.
Should you book this Street Photoshoot and Hidden Gem History Walking Tour
Yes, if your goal is to leave Seoul with polished street portraits and a better understanding of what you’re seeing. The combination of historian-style guidance and a pro photographer is the key. It turns a short 2-hour window into something you’ll keep using, thanks to the edited photo delivery.
Book it if you want structure. The route through Ikseon-dong, Jongmyo Shrine, Sewoon Arcade, and Cheonggyecheon gives you variety without requiring you to plan every shot. And ending in Ikseon-dong is practical, because you can keep the day going with food and cafés right after.
Don’t book it if you hate walking or can’t manage a moderate pace. In that case, choose a more seated-friendly tour.
If you do book, show up with comfortable shoes, water, and a camera that’s charged. Then let James and Jacob do their thing, follow the photographer’s cues, and you’ll get a Seoul day that looks better than your average sightseeing photos.
FAQ
How long is the Seoul street photoshoot and history walking tour?
The tour lasts about 2 hours.
Where do we meet for the tour?
You meet at Jongno 3-ga Station, Exit 5.
When and where does the tour end?
The tour ends in Ikseon-dong.
What’s included in the price?
Included items are historical storytelling, photo stops, exploration of Seoul UNESCO Heritages, a stroll through Hanok Village, and all edited photos with post-processing and color edits. You also get a downloadable Microsoft OneDrive link available for one month.
Do I need to bring a camera?
Yes. The tour suggests bringing a camera, along with comfortable shoes, hat, sunscreen, and water.
Are meals included?
No, meals are not included.
Is an umbrella provided if it rains?
No. Umbrella is not included.
What group size is it?
It’s a small group limited to 10 participants.
What languages are the guides speaking?
The tour is offered in English and Korean.
What are the cancellation terms?
You can cancel up to 24 hours in advance for a full refund.
Is the tour wheelchair accessible?
No. It is not suitable for wheelchair users and people with mobility impairments.